Our Favorite Features in DaVinci Resolve 19
Over 100 feature upgrades, that’s how serious Blackmagic Design got with DaVinci Resolve 19.
Text-based Timeline Editing, AI-Based Voice Isolation, Automatic Depth Map, Fairlight Ducker Track FX, and much, much more– we’d love to talk about everything but we simply can't cover it all without turning this text into an encyclopedia. Instead, we’re focusing on our top picks; these, that at least for now, we’ve found ourselves using the most often.
Film Look Creator (Studio Only)
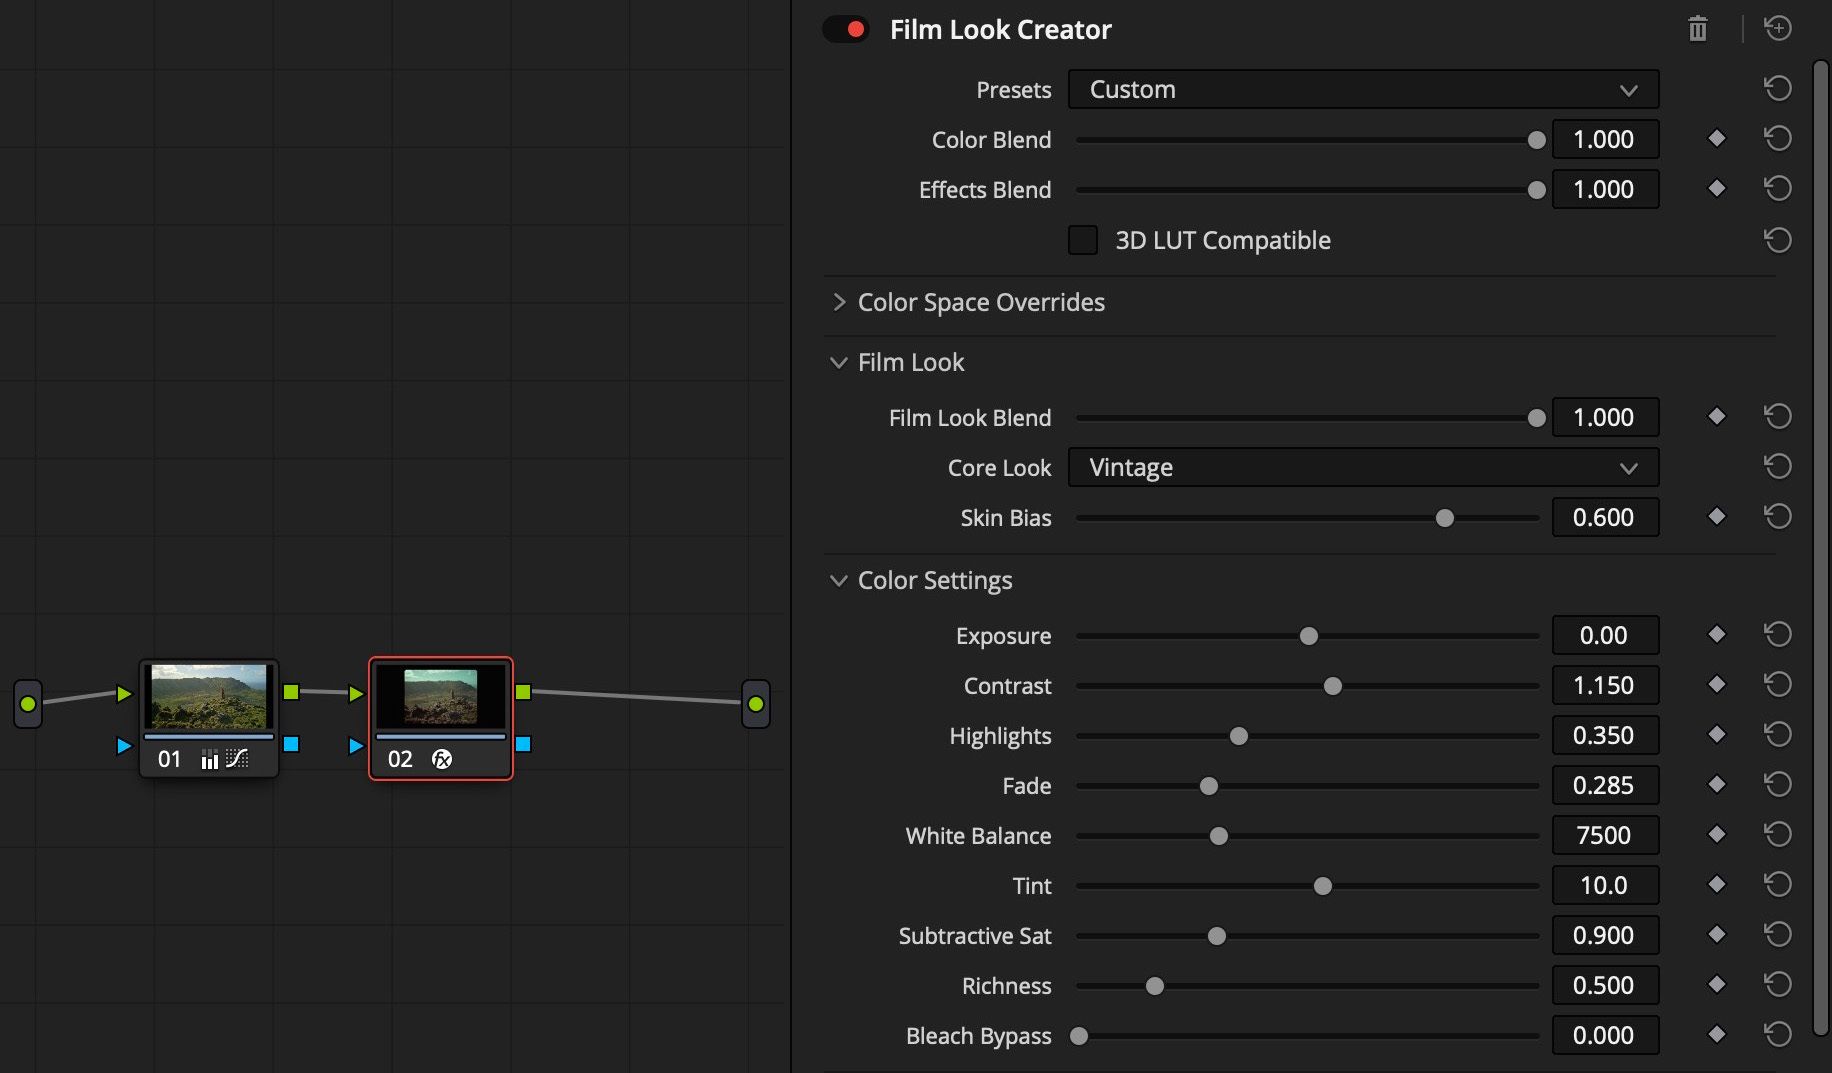
The latest update to DaVinci Resolve 19 introduces a whole bunch of exciting additions for Studio users but one of them has caught our eye in particular — the Film Look Creator. It’s exactly what you need to inject authentic cinematic feeling into your projects.
What's up with the Film Look Creator?
Being more than just some presets, this tool is a complete film lab tucked inside the software, giving you the reins to make alive the precise aesthetic you had in mind. You can choose from a range of film stocks, each with a unique base look that can be toyed with further. For projects aiming for a nostalgic touch, selecting a vintage TV look might be perfect, while others seeking a more contemporary vibe might opt for a crisp widescreen effect.
New Color Settings
One of the highlights of the Film Look Creator available in DaVinci Resolve 19 is the set of new color settings options, which include:
- Split Tone: Allows for independent adjustment of highlights and shadows, giving users more control over the color balance. You can call attention to a sunny day or a gloomy evening with a precision that speaks directly to your audience’s feelings, setting the mood without a word of dialogue.
- Vignette: Adding a vignette can focus the viewer’s attention or add a stylistic aged effect. The Film Look Creator makes this simple, with adjustable intensity and size, allowing for a subtle application that complements rather than overwhelms.
- Halation: This tool mimics the film behavior that would produce that soft glow around bright light sources.
- Bloom: Can brighten or soften the light making it seem like the light is gently spilling out of the source.
Advanced Color Grading Tools
Blackmagic Design would be Blackmagic design if they didn’t add some new color grading capabilities in DaVinci Resolve 19. Among the added functionalities, subtractive saturation and density adjustments stand out. Again, it’s about the ability to deliver film-like results that are both subtle and deeply impactful.
ColorSlice Six Vector Grading
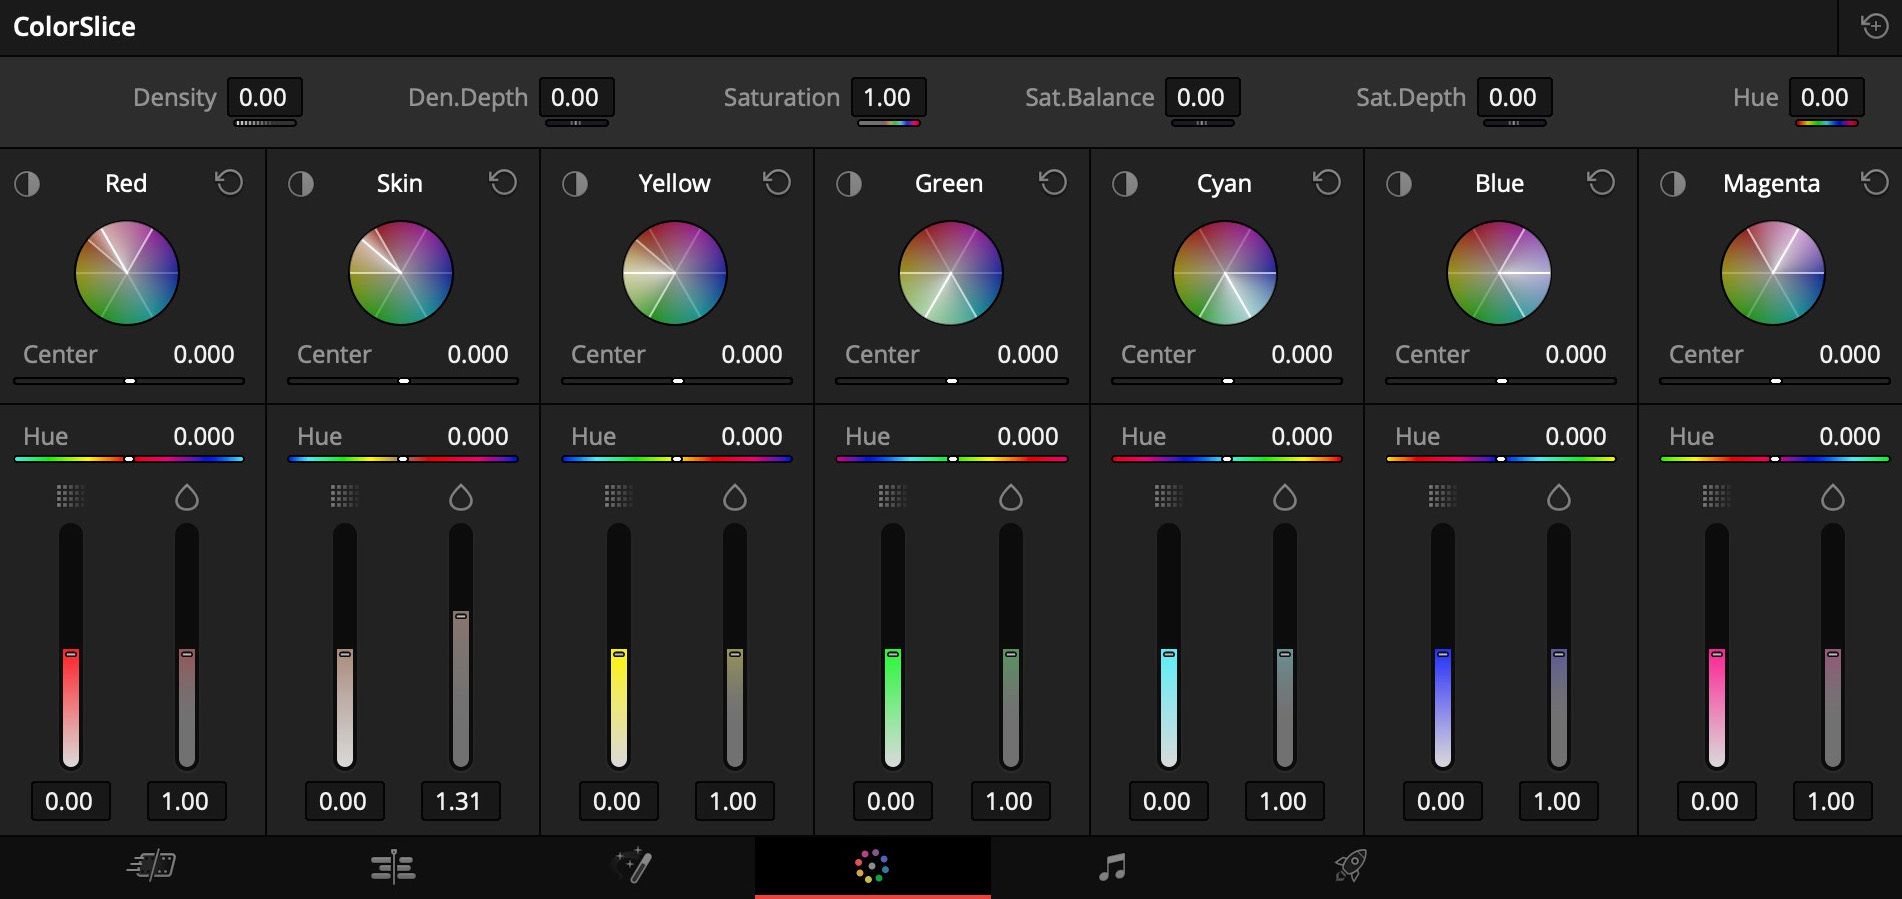
Moving on to the improved ColorSlice feature — It allows you to isolate very specific hues within your footage and adjust their saturation and brightness independently of other colors. This is incredibly useful for dealing with tricky color issues or for creative color effects.
For instance, if you’re working on a scene with a sunset, you might find that the reds and oranges are too dominant, overshadowing other elements. With the color slice tool, brought to us with the latest DaVinci Resolve update, you can dial back just those hues, or perhaps enhance the blues and greens of the surroundings for a more balanced and visually appealing result.
Subtractive Saturation
Traditionally, color grading software boosts colors by adding more color — known as additive color processing. While effective, this can sometimes lead to oversaturation and a loss of detail, especially in lighter areas. DaVinci Resolve 19 stirs it up by enabling subtractive saturation. This method, inspired by classic film color processing, involves reducing certain colors in order to enhance others. It adds depth and richness without overwhelming the image with color.
Such a solution helps keep the look more natural and especially flattering in skin tones and landscapes.
Density Adjustments
Density adjustments work hand-in-hand with subtractive saturation. While saturation deals with the intensity of the colors, density affects their luminance, determining how light or dark those colors are. Adjusting density can help you control the 'weight' of the colors, giving you the ability to make shadows deeper or highlights more subtle without altering the color itself. This can be particularly useful for setting the mood of a scene — a bright, airy feel or a dark, moody atmosphere.
Auto-Normalize Feature in RGB Mixer
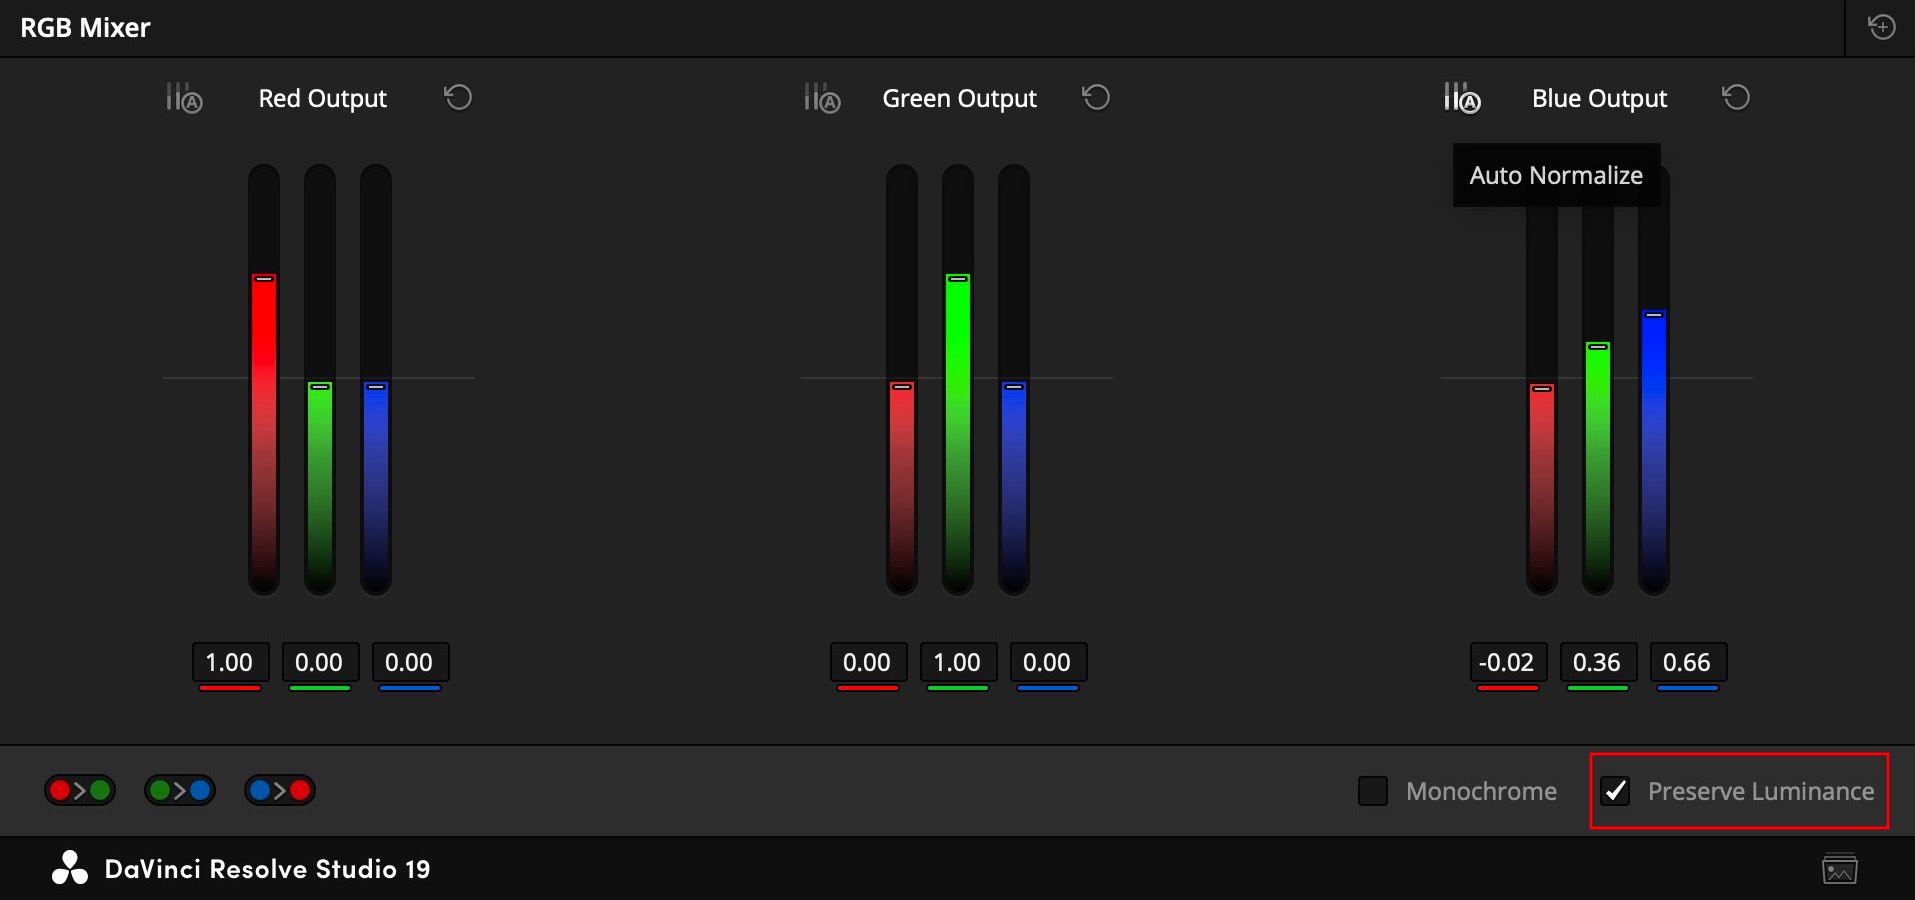
Previously, adjusting color channels individually could lead to unbalanced and unintended results, especially for those less experienced with color science. The auto-normalize feature in DaVinci Resolve 19 automatically compensates for the adjustments made in one channel by making proportional changes in others.
If you increase the red channel in a clip, the auto-normalize function will automatically adjust the green and blue channels to maintain a balanced color mix. This prevents the image from becoming overly dominated by one color, reducing the risk of clipping and ensuring more natural results. It's particularly useful in more complicated color correction duties where maintaining color balance is life and death.
Preserve Luminance Toggle
In the same RGB mixer, we can see a 'preserve luminance' toggle. This bad guy allows users to choose whether the luminance of the image should remain consistent when changes are made to the color channels. When enabled, adjusting a color channel will also preserve the overall luminance of the image, avoiding significant shifts in brightness or darkness that could affect the perceived depth and detail.
Fusion Page
As part of the raft of updates that DaVinci Resolve 19 has brought to the table, Fusion, its powerful visual effects and motion graphics suite, has received some interesting improvements.
Project-level Color Management
The change that’s the most notable in the latest DaVinci Resolve update, at least at first glance, ends the days of constant fighting with inconsistent color schemes across various parts of your project. With the new project-level color management, Fusion now allows you to set a unified color profile that will affect your entire project. This means less time spent trying to get settings in individual nodes right, and more time focusing on creativity and output.
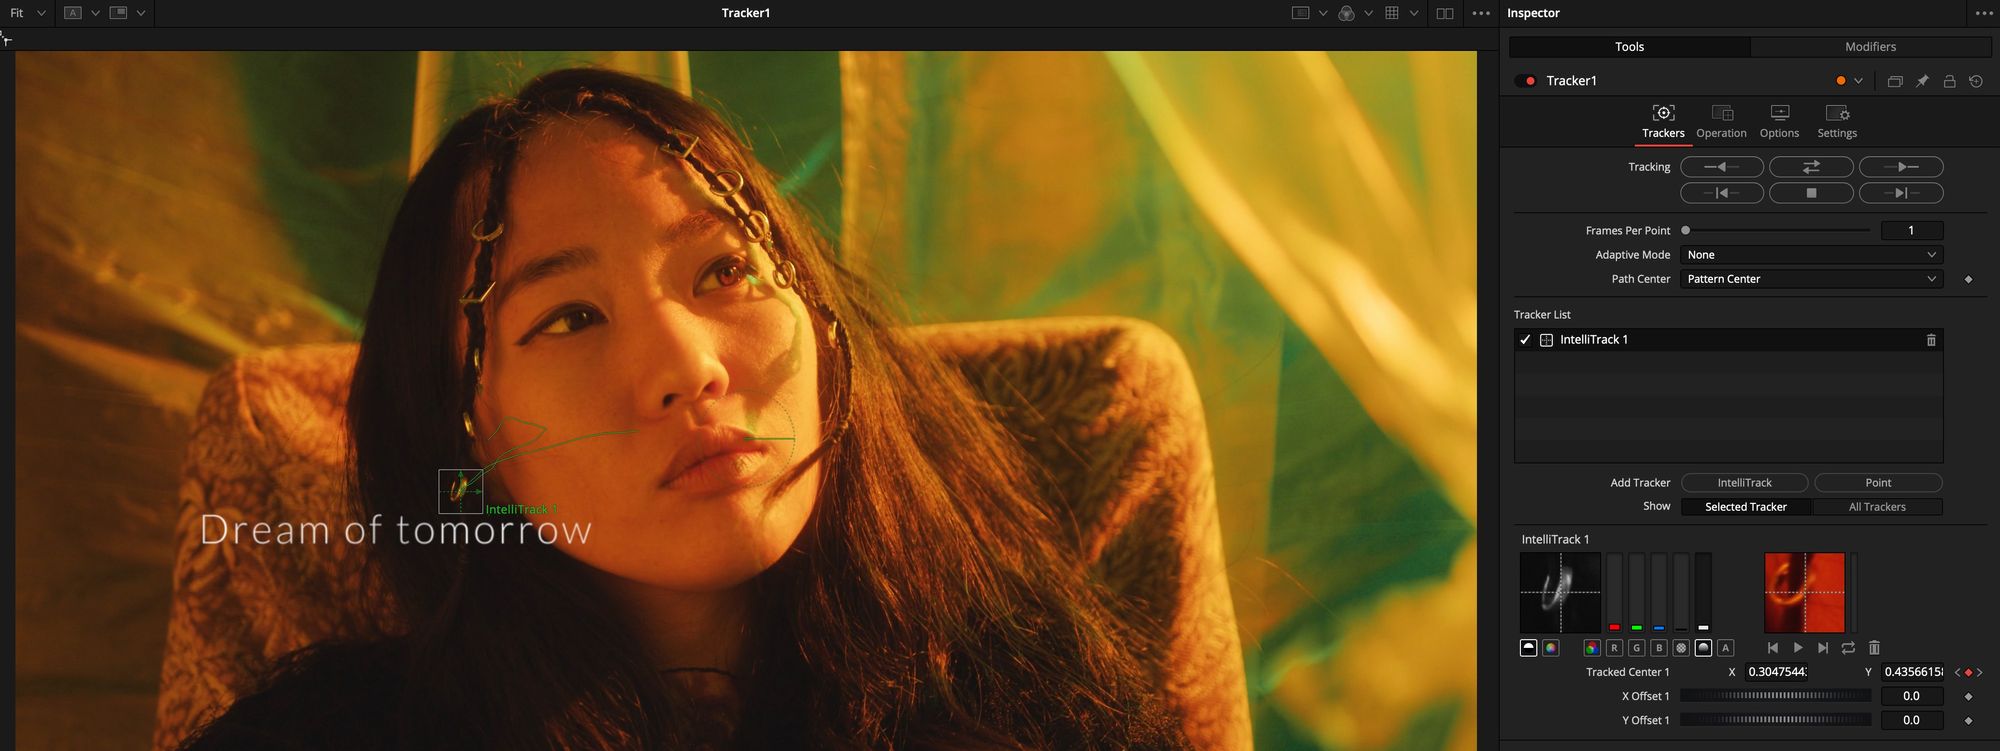
IntelliTrack
The change that will be close to the heart of anyone who's spent hours adjusting tracking points is the introduction of IntelliTrack in DaVinci Resolve 19's Fusion module. While it’s still not perfect, it does make motion tracking less troublesome and quicker.
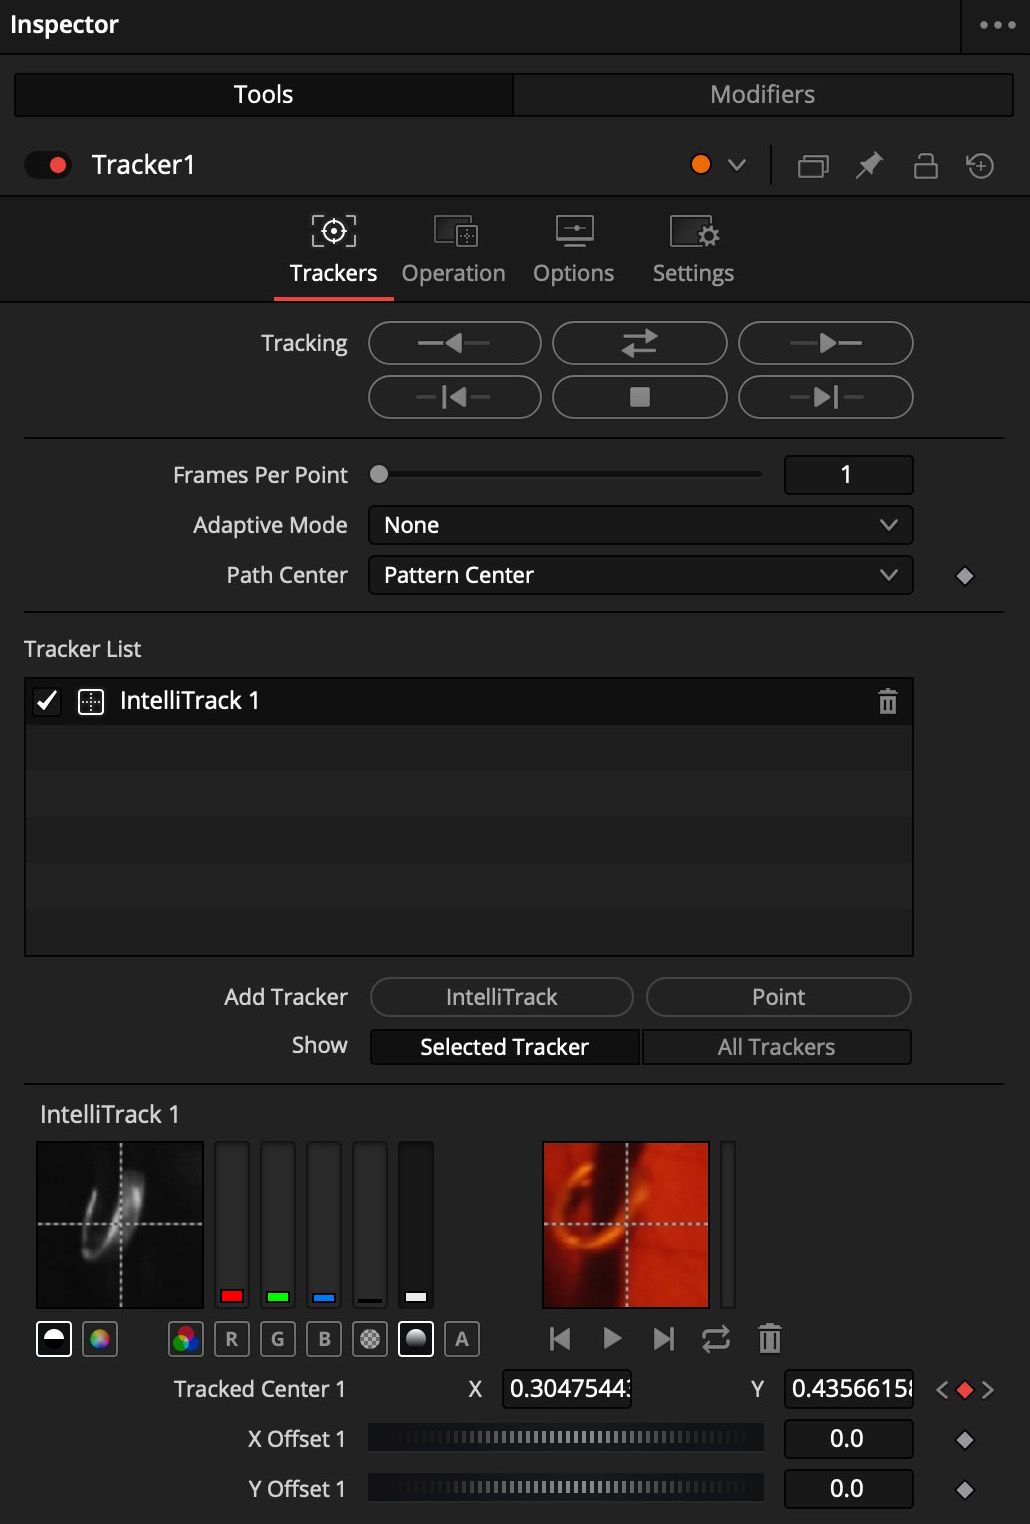
How does it work? You select the object or area you want to track, and IntelliTrack takes over from there. The system evaluates the movement patterns of the selected object and automatically adjusts its tracking points in real time. This dynamic adjustment accounts for changes in speed, direction, and even visibility, such as when an object gets temporarily obscured by another or moves off-screen.
Of course, sometimes it’s still necessary to make some adjustments manually, but here’s hoping for the future of this tool.
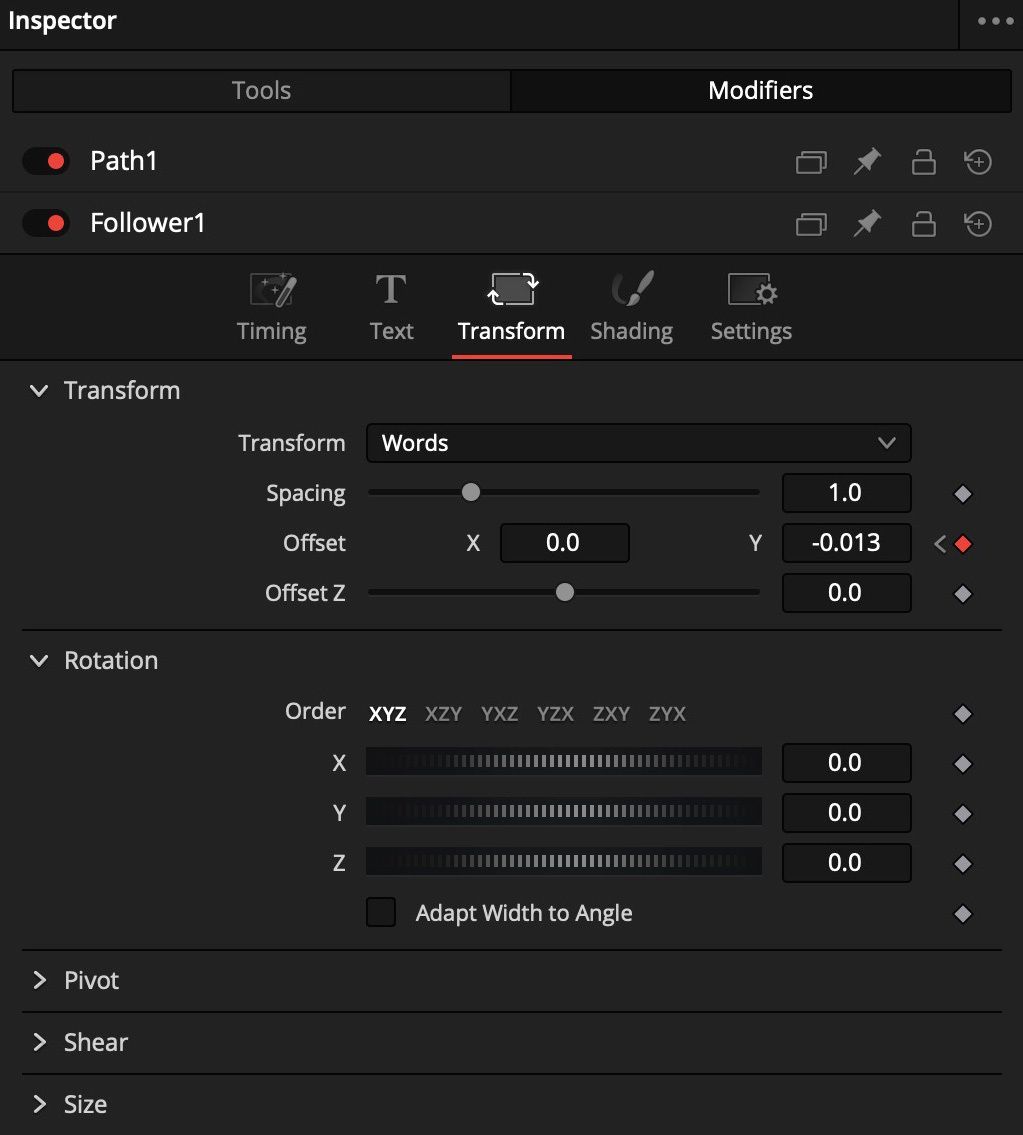
The Follower Modifier
While it might have been easily overlooked, this feature addresses the functionality of text nodes by introducing offset tools that allow for more dynamic text animations.
Once a text node is added to the node tree and styled appropriately — whether that's giving it shadow for depth or adjusting its positioning — one has to then right-click on the text node and select the Follower modifier. So far nothing new. The fun begins in the transform settings of this modifier, where new offset tools appear, enabling transformations that now, aside from applying to characters can also apply to words or lines.
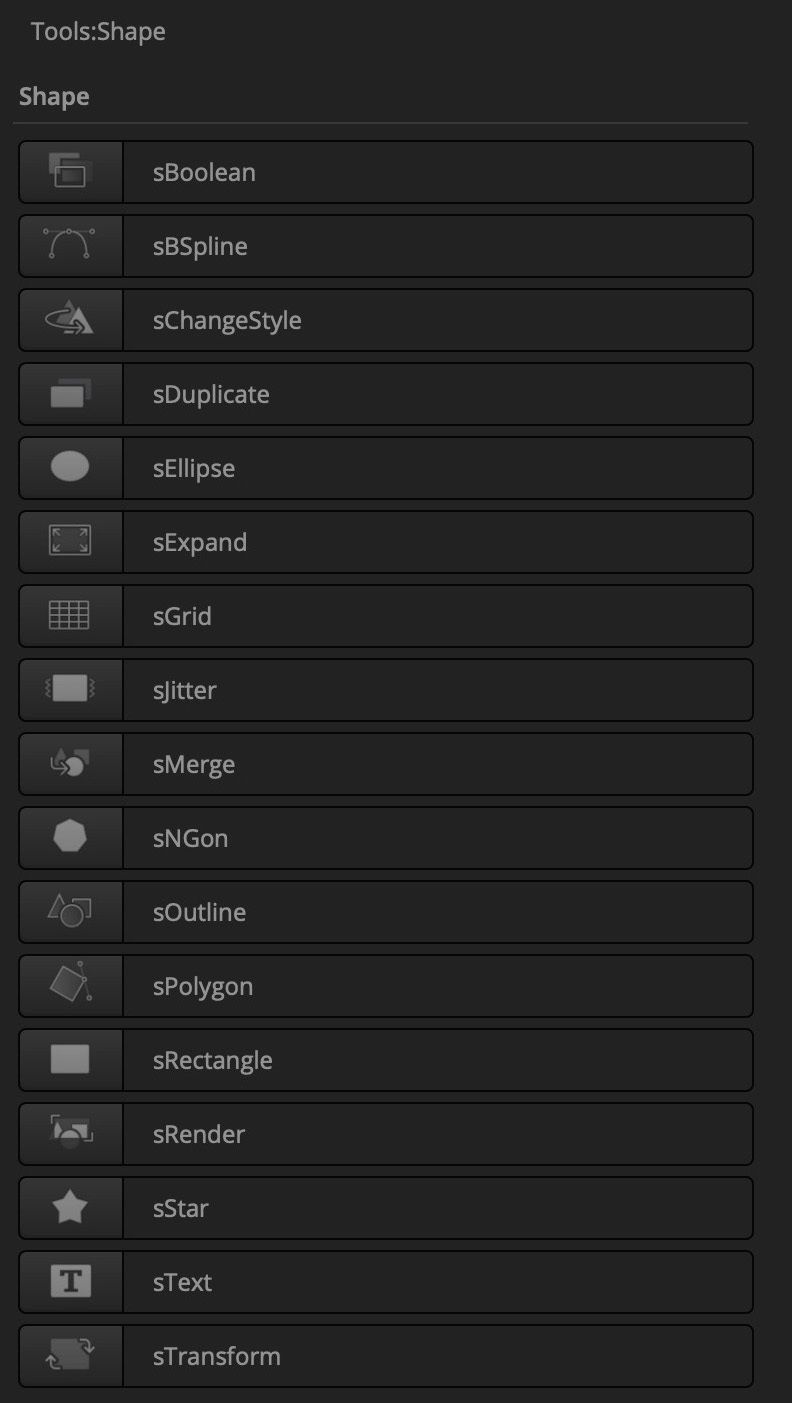
New Shape Nodes
DaVinci Resolve 19's Fusion now includes a set of new shape nodes, including the S Text and B Spline, which expand creative possibilities for animators and designers. These additions allow for even more advanced text styling and precise bezier curve manipulations, making them perfect for detailed motion graphics and complex compositing.
Fairlight
DaVinci Resolve 19's Fairlight audio post-production suite has gained some compelling new capabilities that are surely exciting for those dealing with all types of soundtracks in their footage (this section can be omitted by editors making silent films).
Dialog Separator
It was one of the most highly requested features, and we can see why. With just three sliders: Voice, Background, and Ambience, as well as 3 ‘toggle’ options for muting certain parts of the audio track, it’s now possible to transform the clarity of dialogue in mixed environments. This is particularly handy for those looking to improve vocal clarity without losing the natural ambient sounds that give a scene life. Or just, you know, being able to hear what someone is saying.
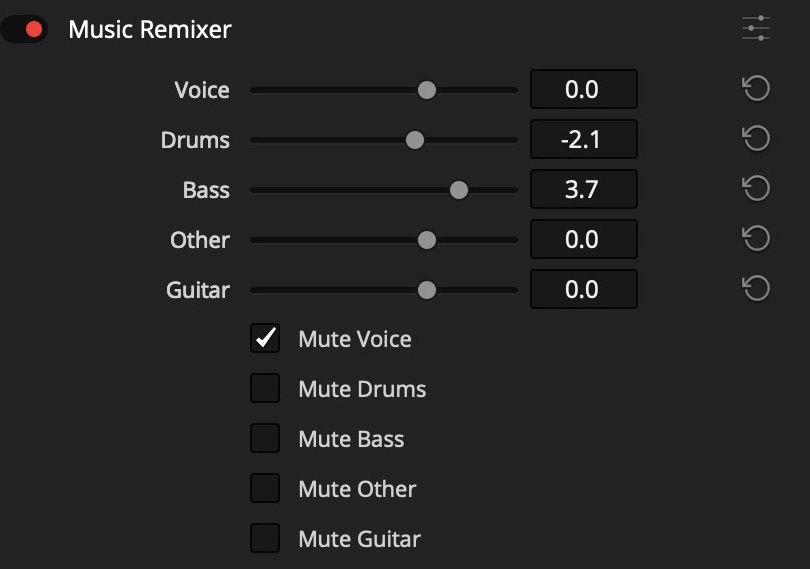
Music Remixer
Next on our audio tour de force is the Music Remixer. This tool feels like it's straight out of a producer's dream because it lets you change individual aspects of a song without disturbing the rest. With the ability to control different 'stems' — think vocals, guitars, drums — you can manipulate parts of your track traditionally locked away in mixed-down audio.
It's especially revolutionary for those working without separate track stems, offering an unprecedented level of control. By isolating each element, you can apply effects selectively — like adding reverb to the vocals while leaving the guitar untouched. This means a flexible project with enriched audio quality.
Ducker
It sounds like a tool meant for encouraging a certain kind of bird to visit you, but, it’s everything but.
In reality, the Ducker in DaVinci Resolve 19’s Fairlight helps you make sure vocals stand out by automatically lowering the volume of background music whenever dialogue is detected. As a bonus, it gets rid of the need for manual keyframing.
As soon as someone starts speaking, the Ducker subtly reduces the music's volume, based on settings you've adjusted like look-ahead time, rise time, hold, and recovery. It’s an ingenious solution for podcasters, filmmakers, and video producers who need to balance speech with soundtrack.
Bonus: Special Feature on the Deliver Page
As a little extra treat, the Deliver page in DaVinci Resolve 19 sports a handy feature for those who like to keep their options open during final output. Within the advanced settings, there’s a toggle called “Render All Video Tracks.” By unchecking this, users get the ability to selectively enable or disable video tracks for export.
For instance, if you want only the graphics from video track three without the other layers, simply disable tracks one and two. In a similar way, if you need everything but the text overlay from track three, you just disable that track. This flexibility can be a significant time-saver and allows for customized exports without the need to reconfigure your entire project.
Conclusion
With the wraps barely off the multitude of features packed into DaVinci Resolve 19, it’s clear we've only just scratched the surface of its capabilities. From the cinematic finesse of the Film Look Creator to the unprecedented level of control offered by the Fairlight suite, each addition helps creators get ready to take it to the next level. But that's just a glimpse into this update; with ongoing updates like transcription editing, shape notes, USD enhancements, new multi-view replay, and revamped timeline features, new possibilities continue to arise.